Everything is drawn client-side, placed exactly where you want it, and stored in a single config file you can share as a string of text. Press Right Shift in game to start. Looking for a specific setting, its default or its range? That is the Full Guide.
/
01
The layout editor
Press Right Shift from anywhere in game to open the editor. Everything you see is the real HUD, live. Modules snap to corners, edges or the center using a stacking algorithm, and when one lines up with another a magenta guide appears and it glides smoothly into place rather than jumping.
Left-click + drag
Move any module — or any individual armor slot — to place it exactly.
Drag empty space
Box-select several modules at once.
Arrow keys
Nudge the selection one pixel at a time.
Hold Shift
Ignore snapping while dragging and place freely.
Scroll wheel
Scale a module, from 50% to 300%.
Right-click a module
Open its own settings context menu, straight from the HUD.
Right-click empty space
Open the global HUD Settings menu: settings, presets, server configs, share codes and a full layout reset.
Seven modules ship with the mod. Each one carries its own color, scale, rainbow mode, background color and opacity, custom label text and anchor.
Tracker
CPS
Counts clicks in the last 1 second window and displays left and right independently. A configurable separator plus free-text prefixes and suffixes let you render 12 | 4, CPS: 12, or anything else you like. Supports rainbow mode and a background.
Loading CPS demo
Featured
Keystrokes
A fully custom keystroke display, not a fixed WASD block. Eleven designs, per-key colors, bold / italic / underline labels, press animations you stack rather than pick between, and a CPS counter on any key including the mouse buttons. Built in the Keystrokes Designer.
Loading Keystrokes demo
Combat
Combo
A hit-streak counter that counts hits once the server confirms them, and shows a combo landed on you as a negative line. A new tier or a kill freezes the counter for an instant, and beating your saved best combo plays a short BEST moment. Color it Static, Rainbow or Heatmap, with three preset difficulties or your own tiers; write the readout with {combo} and {best}, switch the count to Big, and put a timeout bar or your last hits under it. You choose whether the combo breaks on any damage taken, whether it survives switching targets, and how long it lingers before timing out.
Loading Combo demo
Combo heatmap tiers
Mode
Tier 1
Tier 2
Tier 3 (shake)
Easy
3 hits
5 hits
7 hits
Medium (default)
5 hits
8 hits
12 hits
Hard
10 hits
40 hits
60 hits
Custom
Your own (default 5)
Your own (default 8)
Your own (default 12)
With Hit Detection on Server, the default, only hits the server confirms are counted. Classic mode counts every one of those; Modern counts only full-strength hits, respecting the 1.9+ attack cooldown so spam clicking does not inflate your streak.
Combat
Reach
The exact distance in blocks of your last successful melee attack, calculated at the moment of the hit and shown to 2 decimal places. Configurable timeout, optional players-only filter, and an always-show mode with a custom no-hit-yet label instead of disappearing.
Loading Reach demo
Equipment
Armor HUD
All 4 armor slots plus main hand and off hand, as item icons with durability bars. Vertical or horizontal orientation, scalable 50–300%, hotbar-style slot backgrounds, exact durability numbers, and a red flash when a slot takes damage. Slots can be ungrouped and placed individually.
Loading Armor demo
Performance
FPS
Frames per second, updated every tick. Custom suffix text, color, scale, rainbow mode and background — for when you want the number without opening F3.
Loading FPS demo
Network
Ping
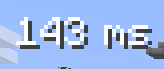
Server latency in milliseconds, read from your own player-list entry — the same value the tab list shows, refreshed whenever the server sends a latency update, roughly once a second on a vanilla server. Custom color, scale and background.
A fully interactive precision designer that lets you completely reimagine how your keystrokes look — no external tools needed. Add any key or mouse button, resize it, drag its label independently, recolor individual keys, pick from eleven designs, and stack as many press animations as you want on top of any of them.
Loading Keystrokes designer demo
Pixel-perfect snapping, context menus, drag-and-drop and unlimited undo / redo.
How to use it
01Right-click Keystrokes in the HUD Editor and choose Open Designer. You can also reach it from the settings menu under Keystrokes → Designer.
02Drag and drop: left-click and drag any key panel to reposition it. Keys snap to their neighbors' edges — and to an even gap between them — then settle smoothly into place.
03Pick a design:DESIGN in the toolbar opens a gallery of eleven — Baseline, Frame, Bar, Soft Block, Segment, Neon, Wedge, Timeline, Hex, Pixel Bevel and Slot. The cards animate themselves, because a design cannot be judged at rest. Choosing one brings the palette and animation it was drawn with, and Wedge and Hex bring their arrangement too — all of it still editable afterwards.
04Animate it:ANIM opens the animation drawer. Motions move the key (Squish, Kick, Sink, Nudge) and fills paint it (Ripple, Sweep, Cascade, Hold Ring, Edge Run, Glow); these are checkboxes, not a choice, so several run at once. One direction is shared by every fill, and the release trail has its own switch because it fires on release rather than on press.
05Context menu: right-click a key to rename it, set its keybind, change colors, toggle bold / italic / underline, duplicate or delete it — and to give that one key its own design or animation, overriding the module's. Right-click empty space to add new keys or reset the layout.
06Edit labels: right-click and drag a key to move its label inside the button — it snaps to the center. Arrow keys nudge the selection pixel by pixel.
07Share it:EXPORT copies the whole keystrokes look — the key layout plus its design, animation and palette — to the clipboard as a share code, and IMPORT reads one back. See presets & share codes.
08Undo / redo: press Ctrl+Z to undo and Ctrl+Y to redo. History covers the design, animation and colors as well as the keys, so one undo puts the whole look back.
Show Background [ON/OFF] · Durability Text [ON/OFF] · Damage Flash [ON/OFF]
Show Main Hand [ON/OFF] · Show Off Hand [ON/OFF]
Ungroup — breaks the stack apart so each slot can be dragged on its own. Right-click a single slot afterwards for Group to snap them back together.
Note
Every menu also starts with Reset Position and Reset Settings. Reset Position restores the anchor, offsets and scale; Reset Settings restores colors and visual options but leaves the module's position and whether it is switched on alone.
Note
Everything here — plus options that have no context-menu entry, such as backgrounds, rainbow mode, combo timeout and combat mode — is also in the settings screen.
A purpose-built settings screen — one page per module, split into tabs, with a search box that finds any setting by name, per-row descriptions and defaults, and a one-click reset on anything you have changed.
It holds a single readable size at any Minecraft GUI Scale, and you can nudge that baseline from 50% to 200%.
Open it from Mod Menu, from Options → Mods → Eymistaken's HUD → Settings, or by right-clicking empty space in the HUD Editor and choosing Settings.
Three ways to keep more than one HUD layout around — all reachable by right-clicking empty space in the HUD Editor.
Saved configs
Save Config takes a snapshot of your entire HUD — every module's position, scale, colors and settings — stored as plain JSON in simplecps_presets/, so you can switch between named layouts instantly. Hover Configs to see the list.
Left-click a name to load it
Right-click a name to rename it
Click the bin icon to delete it
Share codes
Export Code packs your whole setup into a single line of text starting with EYMHUD1- and copies it to your clipboard — paste it into Discord, a forum post, wherever. Import Code reads one back off your clipboard. The Keystrokes Designer has its own EXPORT and IMPORT for the keystrokes module on its own — the key layout together with the design, animation and palette it was drawn with, without the rest of your HUD. Where it goes on your screen is left out on purpose: that corner is yours, not the sender's.
Imports are fully validated before anything is applied. A full-config import saves your current setup as a timestamped backup config first, so a code you did not like is one click away from being undone; a keystrokes import is a single Ctrl+Z in the designer instead
Codes made with a different version of the mod still work, and the status line tells you which version one came from — a code from 1.2.2 or earlier has its key numbers translated to 26.3's on the way in. The exceptions run one way only: a keystrokes code written by v1.2.1 or later carries a design and palette earlier builds have no field for, and any code written by v1.2.3 uses 26.3's key numbering — older builds refuse both outright rather than import half of it or bind the wrong keys
A code from someone running an addon module you do not have imports fine — their settings for it ride along untouched, and the reverse holds too
Server configs
A different HUD per server, with nothing to press. While this is switched on, whatever your HUD looks like on a server is quietly remembered for it — join again and it comes back. Single-player worlds share one profile.
Hover Server Configs to see the list. The server you are on right now is highlighted.
Left-click any entry to use that server's HUD here — handy for copying your PvP setup onto a new server
Right-click to give a server a friendlier name than its address
The [ON] / [OFF] switch in the fly-out header turns the whole feature on or off. It is also in Settings → General.
Note
Whenever a server config replaces what is on screen, the previous setup is written to a config named Auto Backup. It is a single rolling slot, so only the most recent one is kept.
Draws a thin black outline on every side of your HUD text instead of the vanilla drop shadow. Much easier to read against bright terrain like snow or sand.
Note
Only the HUD. Your font choice never touches chat, inventories or any other Minecraft menu — just the HUD modules and this mod's own screens.
Warning
Stuck on the Enchanting Table font? It is unreadable by design, so the HUD Editor shows a Restore Font button in the bottom-right corner whenever it is active. One click puts you back on Vanilla.
Still improving fonts. They are not perfect yet. Sorry.